Garlic Bread with Baguette | Herbed Garlic Butter
This garlic bread with baguette is not like the ones Domino’s delivers with a smear of butter on the surface on the bread. With this garlic bread with baguette recipe, is meant to drench the bread in flavour. Buttery, herby, garlickly flavour. I always keep an extra loaf of bread nearby for anyone who wants to mop of the leftover garlic butter drippings. And there is always someone who wants to do that.

I start by making a log of herbed garlic butter with fresh garlic, thyme, chives and parsley. That can be done days ahead and left in the fridge until dinner calls for it. When it’s time to eat, I cut off as much as I need, melt it slowly with good extra virgin olive oil and give the garlic and herbs 10-15 minutes to release all that flavour into the butter.
Then I warm a crusty baguette or panini, cut it open while it’s still hot and pour the warm garlic butter straight over the top.
And I do mean POUR!
There will be drips. There should be drips. Put the bread in a bowl or on a platter that can catch every last bit, because leaving garlic butter behind is just wasteful…
The outside stays crusty, the middle goes soft and buttery, and the kitchen fills with enough garlic and herbs to make everybody suddenly appear and ask when dinner is ready. Serve it beside your main and let everyone tear off a piece. Just don’t expect the first loaf to last very long.

Why you’ll love this garlic bread
- You can make the garlic butter ahead. Get the messy bit done before you need it, wrap the butter into a log and keep it in the fridge. When friends come over, all you have to do is slice, melt and pour. That’s the kind of organisation I can get excited about.
- It gets flavour right through the bread. We’re cutting into the loaf and pouring warm garlic butter into those openings. The soft centre gets a proper soaking, instead of all the good stuff sitting on the crust while the middle wonders why it was invited.
- You can make as much as the table demands. Cut a small piece from the butter log for one panini or use more for a couple of baguettes. The recipe adjusts easily, although I have never regretted making extra.
- It belongs beside a shared meal. This bread was made for dipping, dragging and mopping. Put it beside anything with a sauce worth saving and watch people clean their plates better than your dishwasher ever could.
How to make garlic butter bread in two parts
The first part is making the herbed garlic butter. Garlic, herbs, salt and pepper are pounded into a rough paste, then mixed through softened butter and rolled into a log. You can prepare this ahead, or use the freshly mixed butter straight away if dinner is happening now. Chilling helps you store and slice it; it isn’t a requirement for melting it.
The second part is where things get exciting. A portion of that butter is warmed gently with extra virgin olive oil, giving the garlic and herbs time to flavour the mixture. Then you pour it over warm bread so it runs into the cuts and soaks deep into the middle.
You could spread cold garlic butter over bread and bake it. I love this pour-over method because the warmed butter flows so easily into the loaf, and the smell while it’s infusing is reason enough to get started.
Part 1: Make the herbed garlic butter
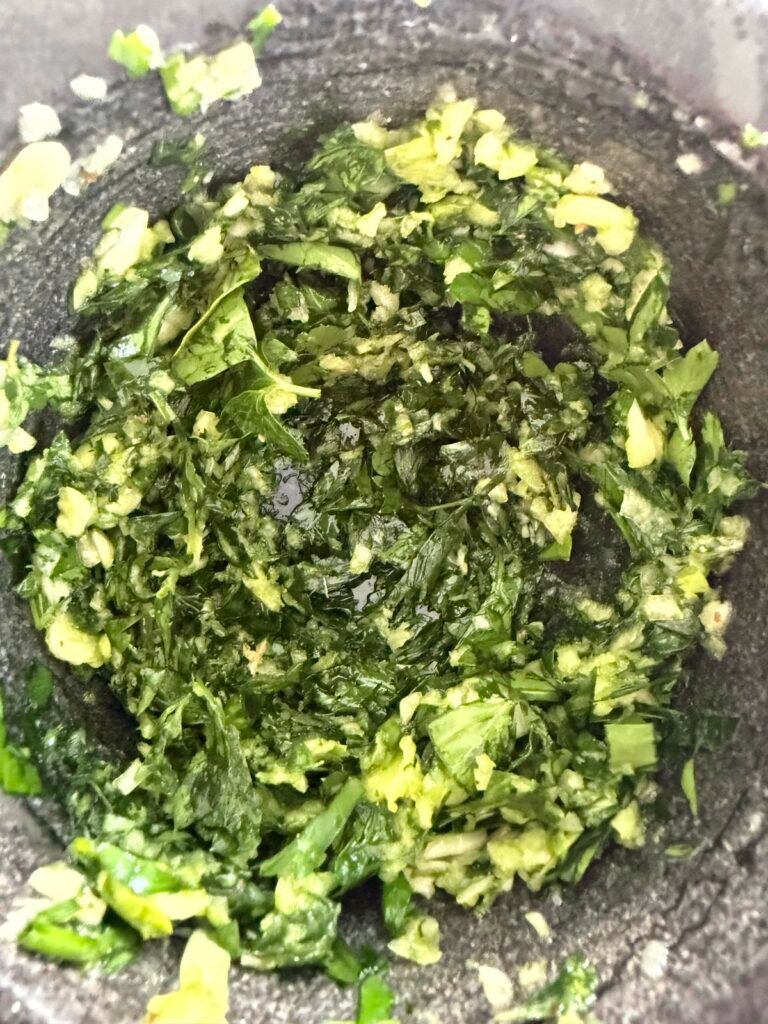
Pound the fresh garlic, thyme leaves, chives and parsley in a pestle and mortar with salt and pepper. Remove any woody stems first. You’re looking for a rough paste, with the garlic broken down and the herbs bruised and fragrant.
Mix the paste thoroughly through softened unsalted butter. For a make-ahead batch, spoon it onto cling wrap, roll it into a tight log and twist the ends. Refrigerate until firm, then slice off what you need when it’s time to make the bread.
Part 2: Warm the butter and soak the bread
Put your portion of garlic butter into a small pan with extra virgin olive oil. My starting point is 100 g garlic butter to 50 ml olive oil, then I adjust the amount of mixture to suit the bread and how gloriously buttery we’re feeling.
Warm over very low heat for 10-15 minutes, stirring occasionally. Meanwhile, warm the baguette, then make deep cuts without slicing all the way through. Place it on a deep serving platter, gently open the cuts and pour the warm garlic butter into them. Spoon any drippings back over the bread and serve straight away.
You’ll find the oven and complete air-fryer alternatives below, along with a few details that make a very good loaf even better.
The butter, garlic, herbs and olive oil
Use good unsalted butter
Butter is doing a lot of work here, so use a good-quality one when you can. It should taste rich and creamy on its own, because there is nowhere for average butter to hide once you pour it all over a loaf of bread.
I use unsalted butter because I want to control the seasoning myself. Different brands contain different amounts of salt, the bread may already be salty, and I’m adding salt while pounding the herbs and garlic. Starting with unsalted butter means I can season it properly instead of crossing my fingers and hoping for the best.
Let the butter soften at room temperature before mixing. You want it soft enough to combine easily with the herb paste, but not melted or greasy. If you press it with a finger, it should give without collapsing into a puddle. Tip: Remove the wrapping paper before it softens, it is much easier while still have structure from being in the fridge.

Which herbs work best in garlic butter?
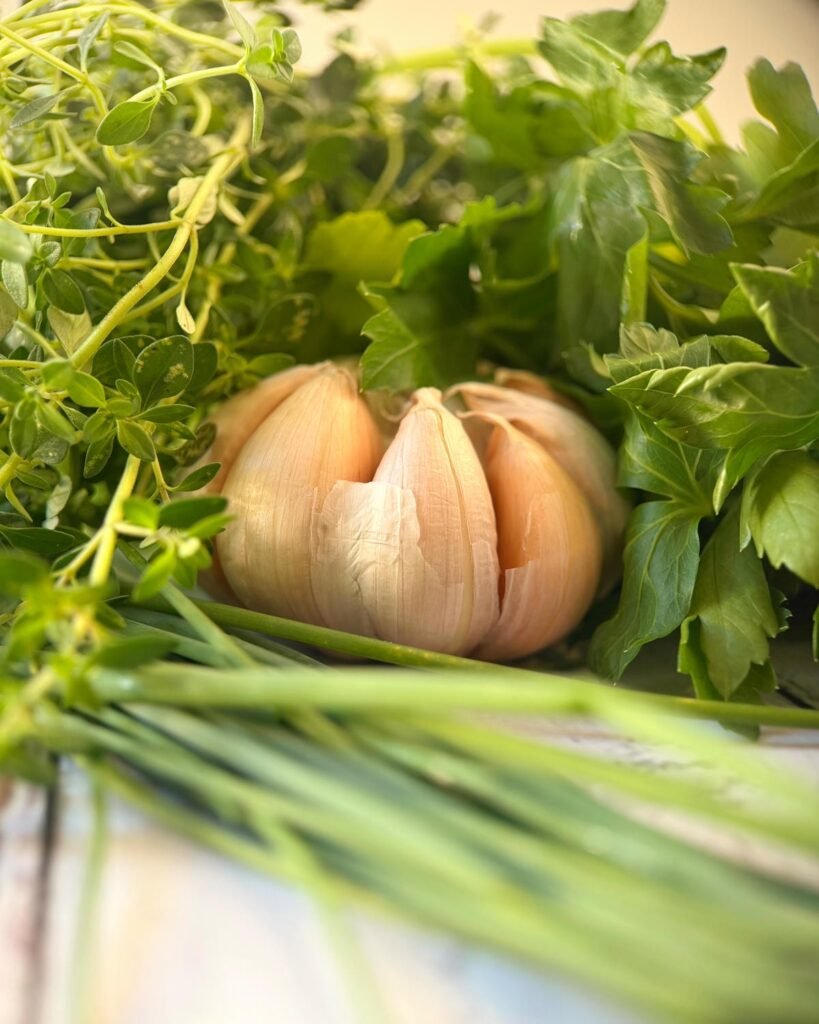
My usual combination is thyme, chives and parsley. This combination works so well with garlic.
You don’t have to follow that combination exactly. This is a very good place to use the herbs you already have. Oregano and rosemary both work well, especially if the bread is going beside lamb, steak or roasted fish. Just remove thick woody stems and pound rosemary particularly well so nobody pulls a small tree branch out of their bread.
I would avoid delicate herbs that don’t enjoy being cooked, especially sweet basil. That beautiful fresh basil aroma disappears quickly with heat and the leaves can darken. Save it for something where it can stay fresh and be appreciated. Garlic bread is not a retirement village for herbs that need using up.
Whatever combination you choose, aim for herbs that can handle the gentle 15–20 minute warming without losing everything that made you choose them in the first place.
Why pound the garlic and herbs?
A pestle and mortar doesn’t just chop the ingredients. It crushes the garlic and bruises the herbs, releasing their oils and turning everything into a rough, fragrant paste that mixes beautifully through the butter.
Add the salt and pepper while you pound. The grains help create friction, making it easier to break down the garlic and herbs. After a minute or two, it should smell so good that eating the mixture directly from the mortar begins to seem reasonable. Please remember there is still raw garlic in there.
If you don’t own a pestle and mortar, chop everything very finely, sprinkle over the salt and press the flat side of your knife through the mixture until it becomes paste-like. It works. You just miss out on the deeply satisfying experience of attacking garlic with a heavy stone.
Use extra virgin olive oil you actually like
Use the same extra virgin olive oil you would happily pour over a salad. You are going to taste it, so this is not the moment for the mysterious bottle that has been living beside the stove since nobody can remember.
I use roughly half as much olive oil as butter by volume when I warm the mixture. For 100 g of garlic butter, about 50 ml of extra virgin olive oil is a good starting point.
The oil loosens the melted butter so it pours easily into the bread, and it adds its own grassy, peppery flavour. It also helps the mixture stay fluid enough to reach deep into all those cuts instead of sitting on top like a very expensive hat.
Warm the garlic butter gently on the stovetop
This part should smell incredible, but it should never sound aggressive.
Put the garlic butter and olive oil into a small pan over the lowest heat you can manage. Let them warm together for 15–20 minutes, stirring occasionally. You may see the gentlest movement around the garlic and herbs, but you do not want hard sizzling or browning.
We’re slowly drawing the flavour out of the herbs and garlic. If the heat is too high, the milk solids in the butter can burn and the garlic can turn bitter. Browned garlic has its place. That place is not swimming through the bread we have just promised everyone.
If the mixture starts frying enthusiastically, move the pan off the heat for a moment and turn the temperature down.

Oven method for warming the garlic butter
If you’re already using every burner, put the garlic butter and olive oil into a small, deep oven-safe dish instead. Cover with an oven-safe lid or securely fitted foil and keep the garlic and herbs submerged in the mixture.
Use 120°C (250°F) in a conventional oven, or 100°C (210°F) in a fan-forced oven, as a starting setting for 15–20 minutes. Stir halfway through and check the mixture as it warms. These are gentle starting temperatures, rather than a guarantee that every oven and dish will behave identically.
Take it out when the butter is melted and fragrant. The garlic and herbs shouldn’t be browning. If the butter melts early and starts bubbling strongly, remove it and let it continue infusing in the covered dish off the heat.
How to make garlic bread in an air fryer
You can use the air fryer for both parts of the warming process: first the garlic butter, then the bread. Keep the butter dish separate from the bread until you’re ready to pour.
- Warm the garlic butter. Put the garlic butter and olive oil into a small, deep dish suitable for your air fryer. Use an air-fryer-safe lid, or secure foil firmly to the rim if your appliance permits it. Set the air fryer to 100°C (210°F) and allow up to 10-15 minutes for gentle warming and infusion. Check after 10 minutes and stir so the herbs stay submerged. Remove it sooner if it begins sizzling or browning.
- Adjust for your appliance. If its minimum temperature is 120°C (250°F), use that setting and begin checking after 8 minutes. Once the butter is melted and fragrant, remove the dish and let the mixture continue infusing in the covered dish off the heat. The garlic should stay pale rather than brown.
- Warm the bread. Remove the butter dish, then increase the temperature to 160°C (320°F). Warm the baguette or panini rolls for about 3–5 minutes, checking early. Cut a long baguette into sections if needed so it fits without crowding the basket.
- Cut, pour and serve. Transfer the hot bread to a deep platter. Make deep cuts without slicing completely through, gently open them and pour the warm butter into the openings. Serve immediately, with the drippings ready for mopping.
Air fryers vary, so use the timing as a starting point and watch the bread and butter. Some behave like calm little ovens. Others behave like they have something to prove.
What is the best bread for garlic bread?
Use any crusty bread you love. A baguette is my usual choice because you get plenty of crisp edges and it looks brilliant placed whole in the middle of the table. Panini rolls are also excellent, especially when you want smaller portions people can pick up easily. Ciabatta, sourdough and a crusty Italian loaf will all work. What matters is having a good crust and enough soft interior to absorb the butter without immediately giving up on life.
Warm and cut the baguette
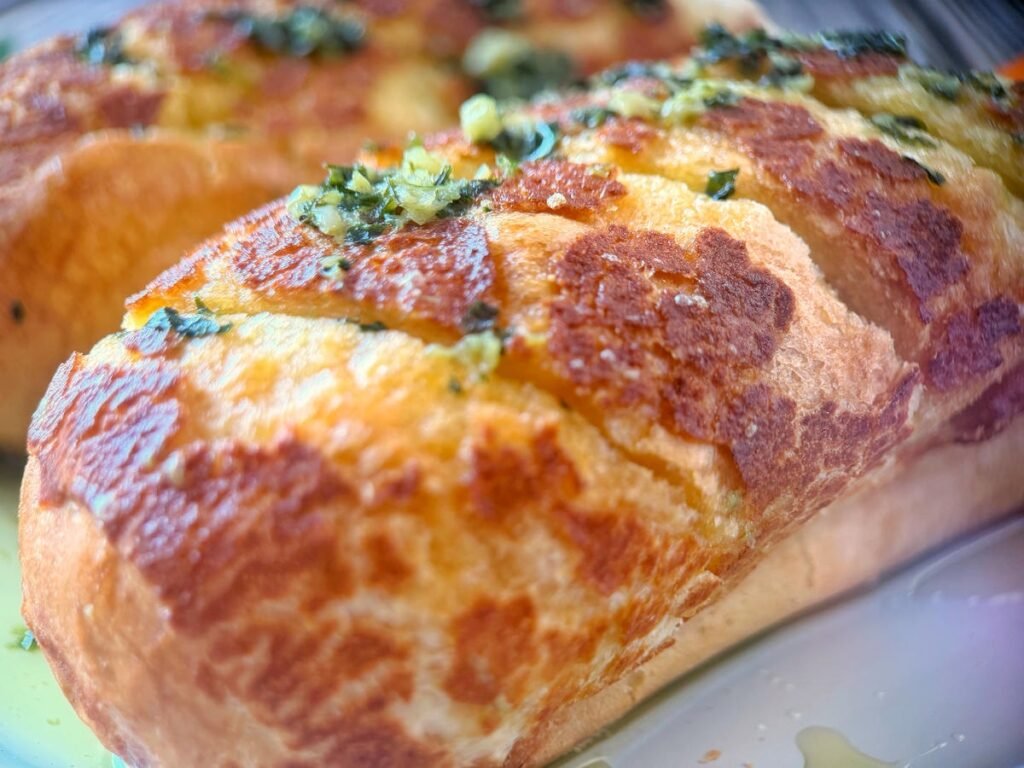
Warm the bread in the oven or air fryer before pouring. You’re not trying to turn it into a crouton; you just want the outside crisp and the centre warm. For a baguette, around 5–8 minutes in a 180°C oven is usually enough. In an air fryer, start with 3–5 minutes at 160°C and check it early, because air fryers have a habit of going from “not quite ready” to “ancient artefact” while you look away.
Once warm, cut deep slices across the bread without cutting all the way through. Gently open those cuts so the butter has somewhere to go. If you’re using panini, you can slice them open through the middle or make several deep cuts along the top.

Pour it over while everything is warm
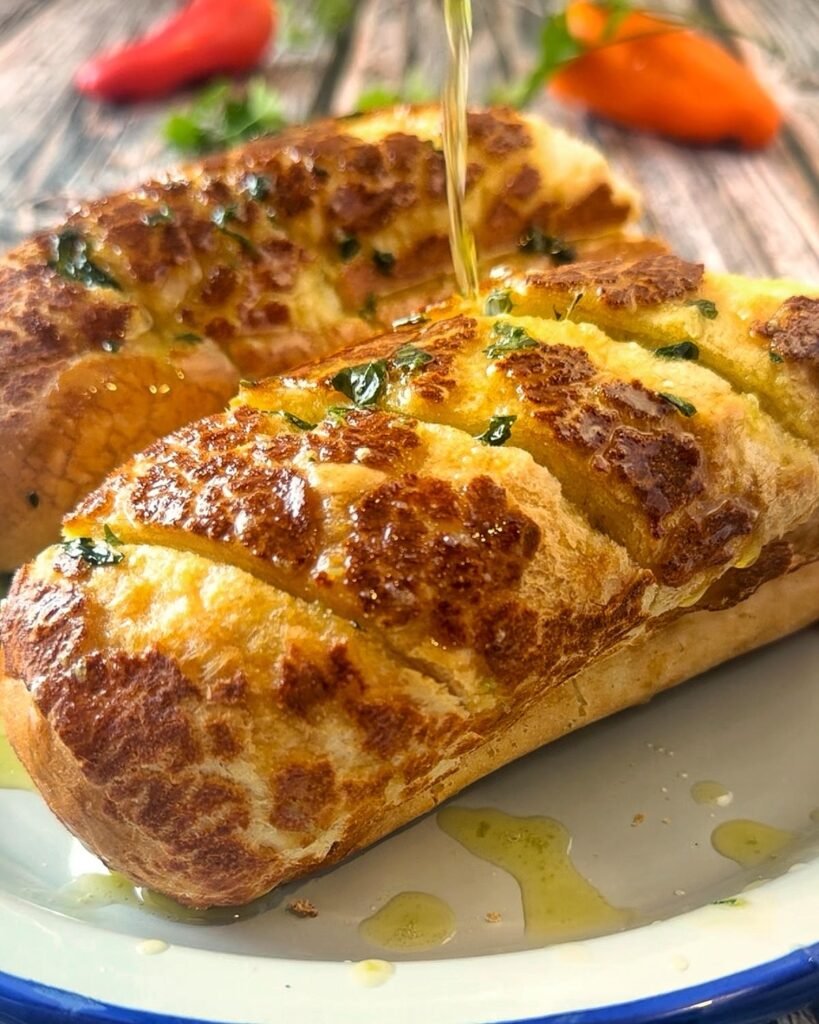
Place the bread in a shallow bowl, deep platter or tray before you pour anything. There will be excess garlic butter running down the sides, and that is a feature, not a mistake. The dish catches it so you can spoon it back over the bread or drag torn pieces through it at the table.
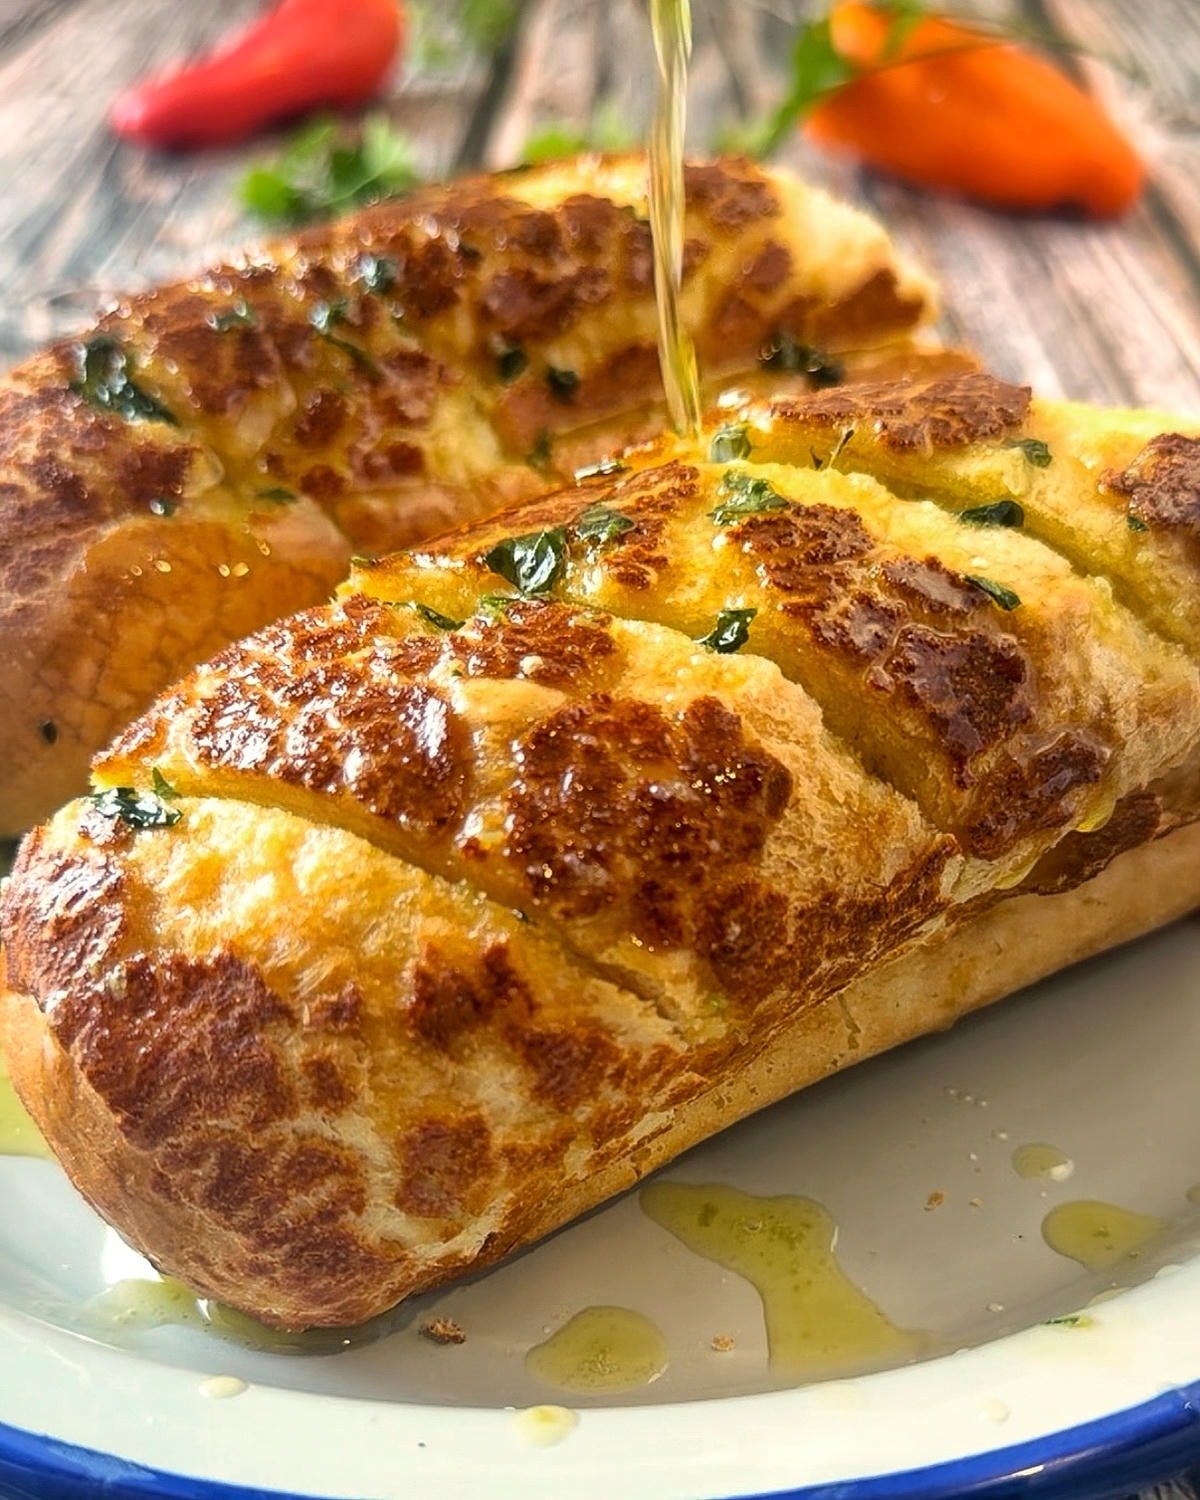
Slowly pour the warm butter into the cuts first, opening the bread as you go. Once the inside has had a proper soaking, pour the rest across the top. Let the bread sit for a minute so the soft centre can absorb the butter, then bring the whole thing straight to the table while it’s warm, fragrant and dangerously easy to keep eating.
I like to serve the loaf whole on a large platter and let everyone tear off what they want. It is generous, messy and exactly how garlic bread should be eaten. Individual side plates can happen afterwards. The good stuff goes in the middle.
What to serve with herbed garlic bread
This bread is at its best beside a meal with plenty of sauce or juices worth chasing around the plate.
Serve it with my tomato seafood stew and use it to mop up that garlicky tomato broth after the seafood disappears. I would make extra bread for this one. That sauce sitting at the bottom of the bowl is far too good to leave behind.
It’s also brilliant with my slow-cooked lamb ragu. Put the big platter of pasta in the middle, add this garlic bread alongside it and let everybody help themselves. Yes, pasta and bread are both carbohydrates. Thank you for noticing. We are having dinner, not sitting an exam.
For steak night, serve it beside my Florentine-style T-bone steak. The bread catches the steak juices, garlic butter and any chimichurri that escapes onto the serving board. That combination gets messy very quickly and nobody at our table has ever complained.
It will also be perfect with my one-pan whole roasted barramundi once that recipe is on the blog. Tear off a piece, drag it through the roasting juices and make sure none of the garlic, herbs or fish juices are left on the platter. Consider it part of the washing-up process.
Make-ahead and storage
The herbed garlic butter is the part to make ahead. Shape it into a tight log with cling wrap, twist the ends and refrigerate until firm. When you need it, unwrap one end, slice off the amount you want and return the rest to the fridge.
I make mine several days ahead and sometimes up to a week before using it. Keep it well wrapped so it stays fresh and everything else in the fridge smell of garlic. To be honest, no complaints from me, but I my wife might have something to say…
For longer storage, slice the chilled log into portions and freeze them in an airtight container. Then you can take out exactly what you need for bread, steak, vegetables or a last-minute attempt to make Tuesday dinner more exciting.
The finished garlic bread is best eaten immediately while the crust is crisp and the butter is warm. Leftovers can be wrapped and refrigerated, then reheated in the oven or air fryer. They will still be good. They just won’t have that first-pour magic, and pretending otherwise would be dishonest.

Ingredients
Garlic Butter
- 250 g Butter softened
- 1 bulb garlic
- 15 g fresh thyme stem removed. 5g if using dried
- 10 g chives finely chopped
- 20 g parsley leaves only, finely chopped
- pinch salt
- pinch pepper
Garlic Bread
- Baguette or other preferred crusty bread
- 50 ml extract virgin olive oil
Instructions
Part 1: Make garlic butter
- Take butter our of paper wrapping, place on a dish on the benchtop to soften.
- Pound garlic, parsley, chives, thyme, salt and pepper in a pestle mortar until you get a paste.
- Mix paste with softened butter thoroughly. Transfer the garlic butter mixture onto cling wrap and wrap into a log or block and refrigerate to harden
Part 2: Make the garlic bread
- Take 100g of the garlic butter and place into a small saucepan along with 50ml of extra virgin olive oil.If using stove top: set heat to lowest setting and heat for 10 – 15 minutes. Being careful not to burn the herbs or garlicIf using oven: pre-heat over to 100c and heat for 10-15minutesIf using airfryer: cover the butter with foil and heat at 100c for 8-15 minutes. Checking after 8 minutes to make sure butter, garlic or herbs have not burnt.
- Warm up baguette in the oven or airfryer for 8 minutes at 160c. Once warm, slice the top of the baguette (leaving the bottom intact) then place the bread onto a deep dish or bowl
- Pour over the hot garlic butter over the warm bread to leave it soak in through all the crevices and cuts in the bread. Let the bread sit for 2 minutes to soak up the garlic butter.